
Introduction
If you own one of the popular Anet A8 3D printers, you have probably read about or experienced the dreaded burnt heat bed connector. In this post I will talk about how and why this happens, and ways to fix or even prevent this before it becomes a problem.

What is this and how does it happen
In the image seen above, the brown area on the side of the connector is heated burnt plastic. This is caused from the metal connector inside the plastic housing getting hot. Why does this get hot you ask? The root cause of this problem is movement of the connector due to the wires not being secured. As the printer is printing and moving forward and back, the wires are constantly moving from side to side. This movement puts stress on the connectors inside the plastic housing as they are connected to the pin causing micro gaps between the connectors and the pins. Because of these gaps the high current traveling through the connector arcs across these gaps. Every time an arc happens, a small amount of oxidation builds up at the point where the arc happened. As the connector continues to arc and the oxidation on the connector and pin builds up, this causes resistance. With resistance and high current comes heat. The more the movement, the more arcing. The more arcing the more oxidation buildup. The more oxidation buildup the higher the resistance. The higher the resistance, the more heat. All this until the connector can't take it any more. If it gets bad enough, this can start a fire.

A fundamental cause of the problem
 The Anet A8 printer has a fundamental design flaw in the heat bed connector from the get go that can increase the chances of the connector heating up and burning out. The connector used on the heat bed is a VHR-6N manufactured by JST. The easiest is to buy a pre-made harness rather than the connector. If you just buy the connector, then you have to have the proper crimper to attach the connectors. There are not a lot of companies that sell a full harness that I have found. They can be found on ebay though. Just do a search for "JST VHR-6N harness". You can usually get them in 1 or 2 foot lengths. Next, if you look at the data sheet for this connector (http://www.jst-mfg.com/product/pdf/eng/eVH.pdf), it has a rating of 10 amps. That is 10 amps per pin which is close to what the heat bed draws, actually a little less. The heat bed has a resistance of around 1 ohm, and according to ohms law, current = voltage / resistance, so at 12 volts, the heat bed should draw approximately 12 amps. The connector has 6 pins, but the manufacturers of the Anet A8 decided to only use 4 of the 6 pins with their wiring. The outer two pins are the power connections for the bed, and the middle two pins are for the heat bed thermistor. Because of this, there is a potential 12 am draw on a pin rated for only 10 amps. The ideal connection would be to use the outer TWO pins on each side, marked + + and - - on the image. Using two wires for each spreads that 12 amps evenly over the 2 pins. Therefore you get a current of 6 amps on each pin which is 4 amps less than what they are rated for which is MUCH safer.
How to fix the problem
I see SO MANY PEOPLE out there that say that the fix for this problem is to add a MOSFET to your power connections for your heat bed. This is NOT the answer. So you may ask, how do I fix this issue. Fixing this issue requires addressing the two problems discussed here, motion of the wire causing arcing, and spreading the connection of the wires on the heat bed across both positive and both negative connector pins to even out the distribution of the current that the heat bed draws.
 The first one is easy to deal with, and that is with the use of strain relief on the wire preventing it from moving the connector. This can be something as simple as using a binder clip to hold the wire to the bed, to a bit more complex using the Y axis cable chain mod. Basically anything that can keep the wire from moving the connector around while printing should work.
The next is to modify or replace the heat bed connector. One mod can be seen in the image above which uses spade connectors that will connect between the two positive and the two negative pins on the connector and using the stock wire. Another option is to buy a replacement heat bed connector that has all four wires and connecting both positives and both negatives together at the heat bed connection point, be that at the main board or mosfet if you have done such a mod.
Conclusion
I hope you found this information informative. I wrote this in the hopes that it can help new Anet users prevent some of the issues that can arise, as well as helping users that have ran into these problems to figure out the best fix for their situation. In any case, happy 3D printing and I hope you get years of use out of your Anet printer.
Related Images:


 I turned to OpenSCAD and came up with a basic design. The box was vented, it had mounting tabs for the PCB and a place to hold the battery box.
  I decided to make it easy to remove from the wall if needed and made the wall plate with two tabs that the cover could lock on to.


 Since your heat block was leaking, you should first disassemble it and clean it. Clean parts reduce the chance of leaking in the future. Remove your heat block assembly from the extruder carriage and set your printer to preheat. preheating for ABS is probably the best as it will get your heat block to around 240 C (464 F) making things easier to clean. With pliers holding the heat block, use a wrench or another set of pliers to remove the nozzle. Once that is removed, your throat tube should come out easily. Be VERY careful as the parts are extremely hot. Use a wire brush to clean away any plastic from the throat tube, heat block and nozzle. You may need to re-heat the parts to clean them good. Once cleaned, you can begin to put it all back together.
 These first steps are easier to do when the parts are cool and you can use your hands to fit them together. The proper way to assemble the heat block is to first thread the nozzle into the heat block, and once it is in all the way, back it off 2 turns. Next, thread the throat tube in until you feel it hit the end of the nozzle threads. DO NOT use pliers on the throat tube. With the throat tube in all the way, grab the heat block with a pair of pliers and use a wrench to tighten the nozzle in place. Once that is all together, heat up the heat block to temperature while holding it with the pliers. This can be done with the heater on the printer, or the burner on your stove. Don't use a torch or it may get too hot. Once heated, tighten the nozzle a bit more. This will ensure that the gap between the throat tube and the nozzle will be closed not letting the filament ooze out. In the illustration above, you will notice that after assembly, the nozzle is still not tight against the heat block. This will allow you to tighten it again if you need to. One more thing to note. Do not put a nut on the throat tube and tighten it to the heat block. This can cause more issues.
  Use the nut on the throat tube to tighten the extruder
  Be careful not to over-tighten the nut as you can easily break the throat tube.
 This is the first prototype design of the 3D printed parts. Some minor changes have been made since this design. The first was to invert the center mount sections so the screws screwed in from the bottom. This put the wind direction vane on the piece with the square mounting peg and the anemometer was moved to the other piece. The reason for this was to keep rain from collecting in the small screw recesses and potentially getting inside the case. The next change which I am in the process of printing as I write this, is a new piece with a round mounting peg instead of a square one. This was done because of a later decision to mount everything using schedule 40 PVC electrical conduit.
 I had built some custom in-wall automation scene controllers based on
  All three of the circuit boards were built on standard 30mm x 70mm prototyping circuit boards like these. My first fully assembled version of the controller can be seen below. Though the design seemed to work good, they were a bit of a pain to put together.
  Building one controller on prototyping boards and wiring it all up took 4 hours or more. After building 3 of them and seeing how they worked, I wanted more, but I didn't want to spend all the time making them. So, it was time to get my feet wet on PCB manufacturing.
 For the design of the main board I broke out all digital and analog IO lines from the pro mini except for A6 and A7. I also have ground, raw 5 volt power plus the 3.3 volt regulated power from the pro mini available on 2 single inline header connectors. A4 and A5 on J3 also provide I2C capabilities to the front board. With all of these, the only limit to what can go on the front board is what you can fit in the small space..
 The design of the keypad board may look a bit crowded, but it was designed that way to make it flexible. Many different keypad designs can be made from this one board. I had gotten the idea for this type of design from a video I had seen by a guy in Australia named

 The buttons can have any text embossed on them, or they can just be left blank. Here are just 3 examples of the many different wall switch designs that can be made using this board. No need to have separate boards printed when you want to put together a new switch. Just grab a board, print the switch layout on your favorite 3D printer and screw it together. Done!
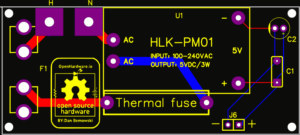 There is nothing fancy with the power supply board. It is based on the standard